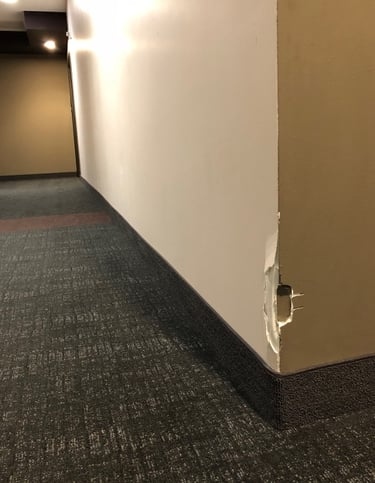
If you’re noticing that your corner bead is separating from your drywall, don’t panic. This is a relatively easy problem to fix. In this article, we’ll show you how to fix corner bead that’s separating from drywall in five simple steps. With a little bit of time and effort, you’ll have your corner bead looking like new again.
What Is Corner Bead?
Corner bead is an important part of any drywall installation. Over time, however, corner bead can become separated from the drywall, causing an unsightly gap. It provides a finished look to the corners of your walls and helps to protect the drywall from damage. Fortunately, this problem is easy to fix with a few simple steps.
How to Reattach Corner Bead Separating from Drywall
Corner bead is an important part of any drywall installation. It provides a finished edge to the drywall and helps to protect the corners of the room from damage. Unfortunately, corner bead can sometimes become detached from the drywall, leaving a gap that can be both unsightly and dangerous.
With a little time and effort, you’ll have your corner bead back in place in no time. Reattaching corner bead is a relatively simple process that can be completed in just a few steps. If you find yourself in this situation, don’t despair!
1 – Remove the Loose Drywall
1 – Remove the Loose Drywall
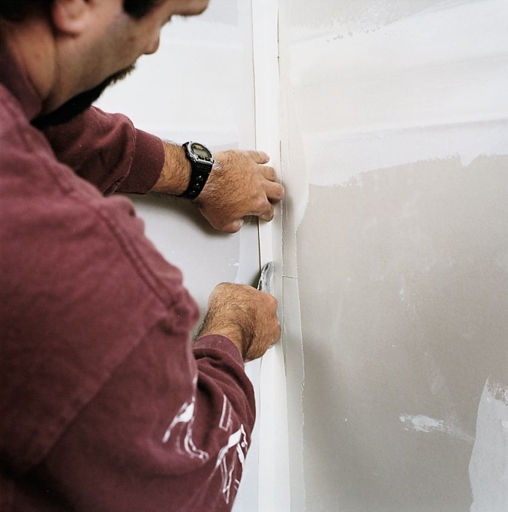
Be careful not to damage the wall. You can use a putty knife or a screwdriver to pry the drywall away from the wall. The first step is to remove any loose drywall.
2 – Cut Away the Damaged Area
Use a utility knife or a saw to cut away the damaged drywall. Once you have removed the loose drywall, you will need to cut away the damaged area.
3 – Apply Drywall Tape to the Seams
Once you have cut away the damaged drywall, you will need to apply drywall tape to the seams. This will help to reinforce the seams and prevent the drywall from separating in the future.
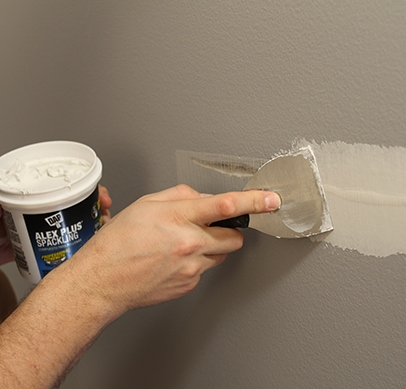
4 – Apply Joint Compound to the Seams
After you have applied the drywall tape, you will need to apply joint compound to the seams. This will help to fill in any gaps and ensure a smooth finish.
5 – Sand the Seams
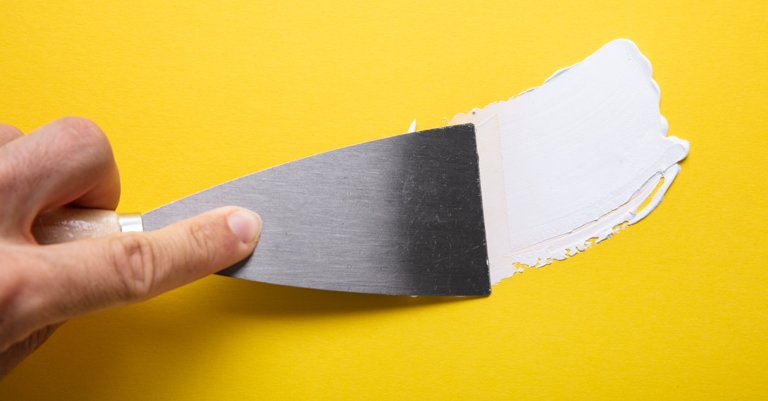
This will help to create a smooth surface. Once the joint compound has dried, you will need to sand the seams.
2 – Straighten the Bent Corner Bead
This is a relatively easy problem to fix, and only requires a few simple steps. If your corner bead is separating from your drywall, don’t panic!
Use a flathead screwdriver or a putty knife to gently pry the bead away from the drywall. Once it’s straightened out, you can reattach it by using drywall screws or nails. 1. First, you’ll need to straighten out the bent corner bead.

2. Next, you’ll need to fill in any gaps between the corner bead and the drywall. Use a putty knife to apply joint compound to the gaps, and then smooth it out.
3. Once the joint compound is dry, you can sand it down to create a smooth surface.
4. Finally, you’ll need to paint over the repaired area to match the rest of the wall.
With these simple steps, you can easily fix a corner bead that’s separating from your drywall.
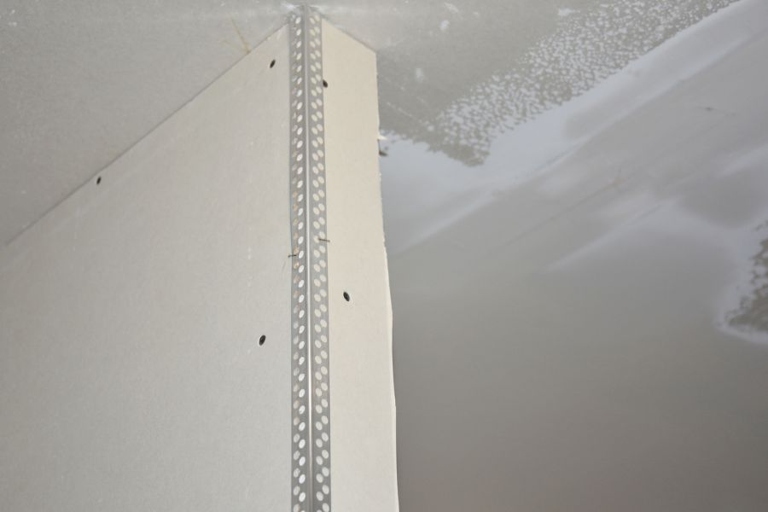
3 – Use Mesh Drywall Tape to Secure the Corner Bead
With a little bit of effort, you can reattach it and get your wall looking good as new. If your corner bead is separating from your drywall, don’t despair!

Here are 5 simple steps to fix your separating corner bead:
If there are any large gaps, you may need to fill them in with joint compound. 1. Start by removing any loose pieces of drywall or corner bead.
2. Once the area is clean, apply a layer of mesh drywall tape to the area where the corner bead is separating from the drywall.
3. Use a putty knife to spread a thin layer of joint compound over the mesh tape.
4. Press the corner bead back into place and hold it there until the joint compound has had a chance to set.
5. Once the joint compound is dry, sand the area smooth and paint over it to match the rest of the wall.
With a little bit of effort, you can easily fix a separating corner bead and get your wall looking good as new!
4 – Apply Drywall Compound
If your corner bead is separating from your drywall, don’t panic! This is a relatively easy problem to fix, and can be done in just a few simple steps.
1. Start by removing any loose or flaking pieces of drywall compound from the area around the separation. Be sure to remove all of the compound, as any remaining bits will just get in the way when you’re trying to reattach the corner bead.
2. Next, apply a generous amount of drywall compound to the back of the corner bead. You want to make sure that the entire surface is covered, as this will help to ensure a strong bond.
3. Once the compound is in place, gently press the corner bead back against the drywall. Hold it in place for a few seconds to allow the compound to start to set.

4. Finally, apply a layer of drywall compound over the entire joint, being sure to smooth it out so that it’s level with the rest of the wall. Allow the compound to dry completely before painting or wallpapering.
5 – Sand and Paint the Treated Area
5 – Sand and Paint the Treated Area
Once the area has been repaired, it will need to be sanded and painted to match the surrounding area. If the bead was originally painted, it will be necessary to use a primer before painting to ensure that the new paint will adhere properly.
How to Replace Damaged Corner Bead on Drywall
In just a few simple steps, you can have your corner bead looking like new again. Here’s what you need to do: If you have damaged corner bead on your drywall, don’t worry – it’s an easy fix!
1 – Remove the Damaged Section of Corner Bead
1 – Remove the Damaged Section of Corner Bead
The first step is to remove the damaged section of corner bead. You can do this by using a utility knife or a drywall saw. Just be careful not to damage the drywall beneath the corner bead.
2 – Cut a New Piece of Corner Bead
Just be sure to measure the new piece of corner bead so that it is the same size as the piece you removed. You can do this by using a utility knife or a drywall saw. Once you have removed the damaged section of corner bead, you will need to cut a new piece to replace it.
3 – Install the New Piece of Corner Bead
The next step is to install the new piece of corner bead. You can do this by using drywall screws or nails. Just be sure to drive the screws or nails into the studs so that the new piece of corner bead is secure.
4 – Apply Joint Compound
After the new piece of corner bead is installed, you will need to apply joint compound to the seams. This will help to blend the new piece of corner bead with the rest of the wall.
5 – Sand the Seams
This will help to create a smooth surface. Once the joint compound is dry, you will need to sand the seams.
2 – Cut and Secure the New Corner Bead
However, if the damage is more significant, you may need to remove a section of drywall around the corner bead before applying a new bead. If the corner bead is only slightly damaged, you can simply cut it away and apply a new bead in its place.

To remove a section of drywall, use a utility knife to score the paper around the damaged area. Be careful not to damage the surrounding drywall. Then, use a pry bar to remove the drywall.
Once the damaged area is removed, apply a new corner bead in its place. Use drywall screws to secure the bead to the drywall. Then, apply joint compound to the bead and allow it to dry.
3 – Apply Drywall Compound on the Corner Bead
If the corner bead is damaged, it will need to be replaced. To do this, first remove the old corner bead with a utility knife. Allow the compound to dry completely before sanding it smooth. Then, install the new corner bead and apply another layer of drywall compound over it. Next, apply a layer of drywall compound to the corner where the new corner bead will be installed.
4 – Sand and Paint the Wall to Finish Your Repairs
If your corner bead is separating from your drywall, it’s important to take care of the problem as soon as possible. Otherwise, the damage will only get worse and could eventually lead to serious structural problems.

All you need is some sandpaper, a putty knife, a can of joint compound, and a paintbrush. Fortunately, repairing corner bead is a relatively simple process that anyone can do.
Here’s how to do it:
This will help to create a smooth surface for the joint compound to adhere to. 1. Start by sanding down the area around the damaged corner bead.
2. Next, use the putty knife to apply a generous amount of joint compound to the area.
3. Then, simply press the corner bead back into place.
4. Once the corner bead is in place, use the paintbrush to apply a thin layer of joint compound over the entire area.
Finally, paint over the area to finish the repair. 5. Allow the joint compound to dry completely, then sand it down until it’s smooth.
What Type of Compound to Use When Filling Corner Bead Cracks?
If you’re noticing cracks along your corner bead, it’s important to take care of them as soon as possible. The first step is to determine what type of compound to use. Not only are they unsightly, but they can also lead to bigger problems down the road. The good news is that filling corner bead cracks is a relatively easy fix.
It’s also important to note that joint compound is much easier to work with than plaster. Plaster is the more traditional option and is ideal for larger cracks. There are two main types of compounds that can be used to fill corner bead cracks: plaster and joint compound. Joint compound, on the other hand, is better for smaller cracks.
If you’re not sure which type of compound to use, it’s always best to err on the side of caution and go with joint compound. Plus, it’s much easier to apply than plaster. It can be used for both small and large cracks, so you’ll be covered no matter what.
Frequently Asked Questions
1. What is corner bead?
Corner bead is a metal or plastic strip that is applied to the outside corners of drywall to give them a clean, finished look.
2. Why is my corner bead separating from the drywall?
There are several reasons why this might happen, but the most common one is that the adhesive that was used to attach the bead to the drywall has failed.
3. How can I fix this problem?
Fortunately, it is a relatively easy problem to fix. All you need is some joint compound and a putty knife.
4. What is the first step?
The first step is to remove any loose pieces of corner bead. Be careful not to damage the drywall underneath.
5. What do I do next?
Next, you will apply a layer of joint compound to the area where the bead was attached.
6. Do I need to wait for the joint compound to dry?
Yes, you should wait for the joint compound to dry completely before proceeding to the next step.
7. What is the next step?
Once the joint compound is dry, you will need to apply a new layer of adhesive to the back of the corner bead.
8. What is the best type of adhesive to use?
There are several different types of adhesives that can be used, but we recommend using an adhesive that is specifically designed for attaching corner bead.
9. How do I apply the adhesive?
You will need to apply the adhesive to the back of the corner bead using a putty knife or a similar tool.
10. What is the final step?
The final step is to press the corner bead into place and hold it there until the adhesive has had a chance to set.
Final thoughts
In conclusion, repairing a corner bead that is separating from drywall is a simple process that anyone can do. All you need is a putty knife, some joint compound, and a little patience. With these five easy steps, you’ll have your corner bead back in no time.